Running SoapUI tests on Jenkins
It is fine to run small and ad hoc API and functional tests from the SoapUI GUI environment but it is not suitable for running automated regression tests that are running on a test automation server by using some form of scheduling mechanism. Fortunately, there is a possibility to run SoapUI tests in a fully automated fashion on e.g. Jenkins server.
In this article, we are going to explain all the steps needed to enable a fully automated SoapUI test on the Jenkins server.
Automating SoapUI to run on Jenkins
The easiest way to automate SoapUI tests to run them on the Jenkins server is to follow these steps:
- Split big SoapUI project
- Create a managing IDE project
- Prepare the Maven build
- Enable versioning
- Running tests on Jenkins
1. Split big SoapUI project
Big SoapUI can create many problems for management and versioning as a project file, essentially an XML file, can become too big and thus cumbersome to: maintain, version, and fix, if necessary. In the screenshot below, we can see such a big project that is composed of many different Test Suites. Each Test Suite is then composed of many different Test Cases, and in turn, each Test Case is composed of various Test Steps:
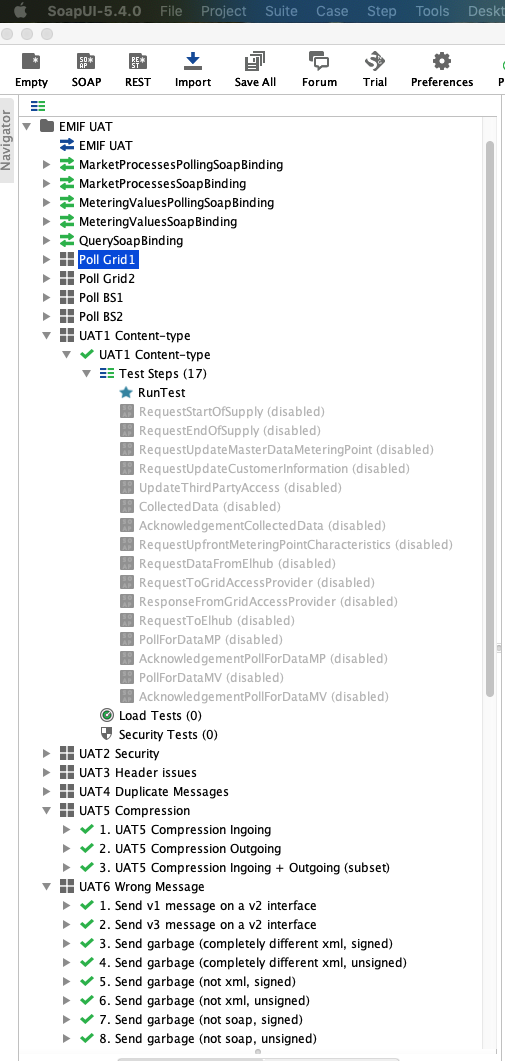
Fig. 1. Project with many Test Suites, Test Cases, and Test Steps
A more manageable way is to split this big project into many smaller projects, each containing essentially one Test Suite:
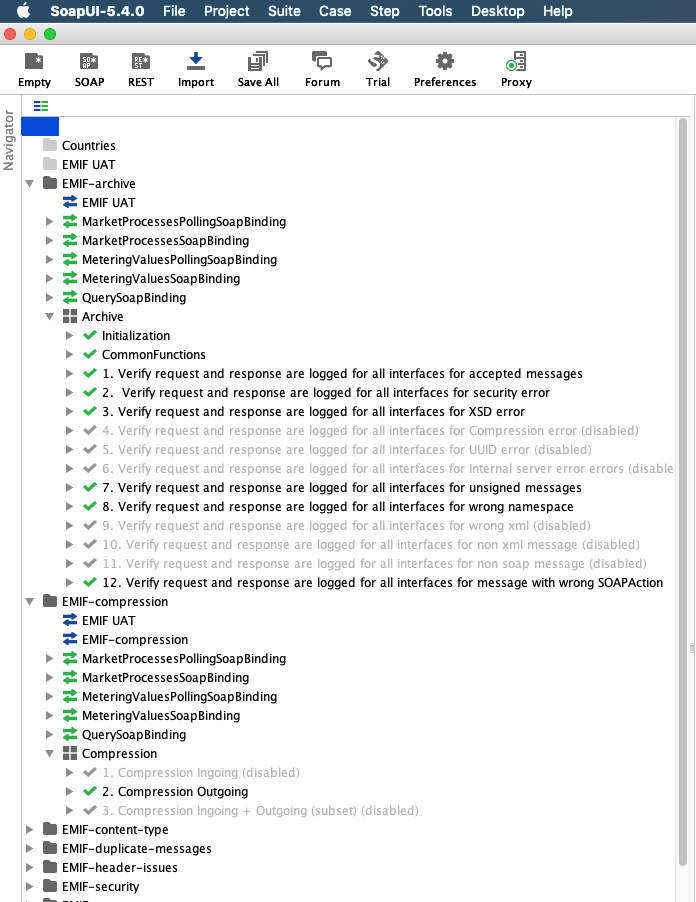
Fig. 2. Big project split into several smaller projects
NOTE: Split projects have to be saved in specific folders (see below)
2. Create a managing IDE project
Because we have to deal with versioning, Maven and Jenkins files, it is easier if we create a project with a specific folder structure in development with an environment of choice. Here we have used IntelliJ to create such a project:
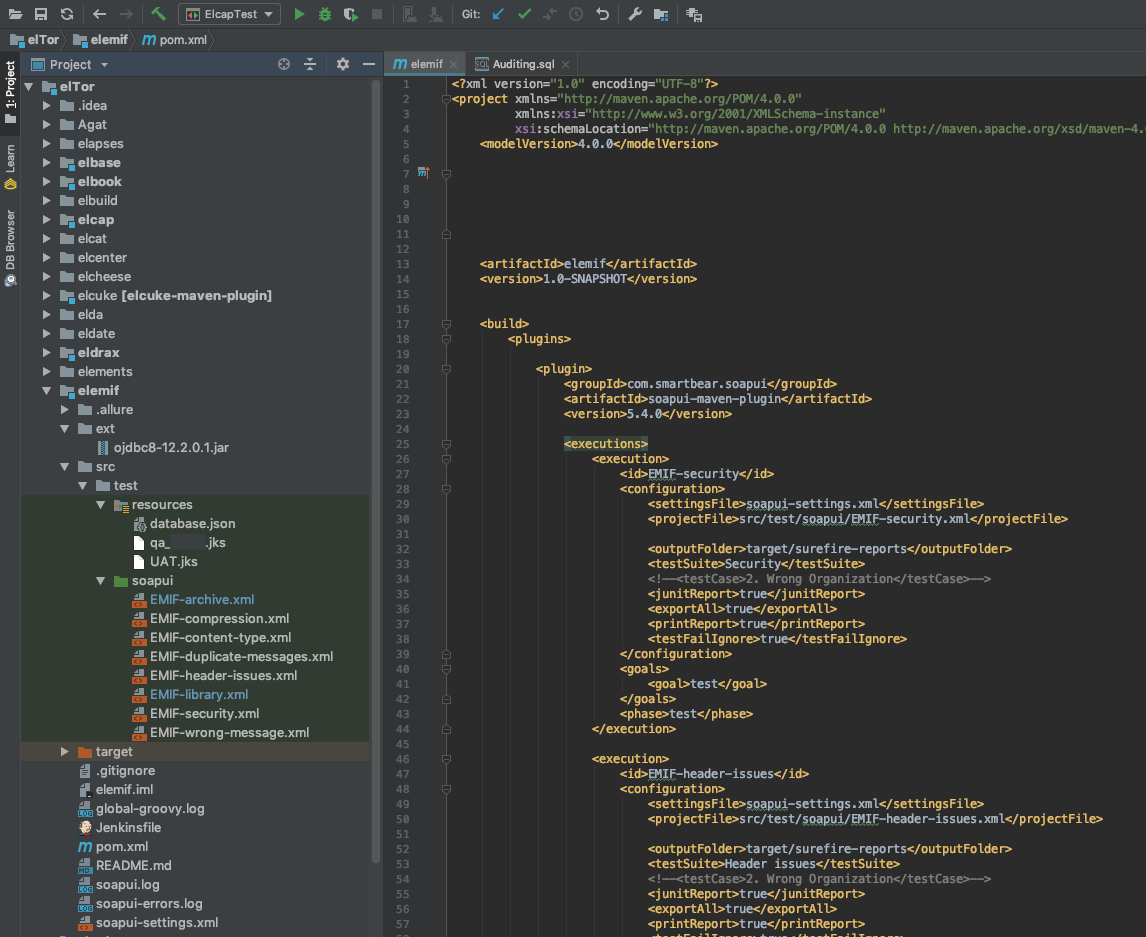
Fig. 3. IntelliJ project for SoapUI projects
Project structure
To run successfully on Jenkins, the IntelliJ project structure has to be composed as follows:
Where:
- Jenkinsfile - contains Jenkins pipeline build instructions
- README.md - optional README file with the setup instructions
- elemif.iml - file generated by IntelliJ
- ext - folder containing additional JAR libraries used during test execution (database driver in this case)
- *.log - various log Files
- pom.xml - Maven build file
- soapui-settings.xml - File that contains SoapUI Preferences
- src/test/resources - folder containing Java Keystore databases and database credentials
- src/test/soapui - folder containing projects that we have split in the previous step and saved to this folder.
Normally SoapUI stores preferences files (soapui-settings.xml) in a user's home folder. We can copy this file to our IDE project location and update it every time we make some important preference changes through SoapUI GUI, or we can discard the file from the original location and make a symbolic link to the file in our IDE project folder.
Setting absolute and relative paths
When we are running our tests from within SoapUI GUI environment we have to supply absolute paths but when we are running our tests from the command line or from e.g. Jenkins server than we have to use relative paths. The same goes for specifying the location of Java Keystore used to sign and/or encrypt our messages. So in a project file (e.g. EMIF-archive.xml), we have to search for the location of Java Keystore database (e.g. qa.jks) and then assure that the absolute path is used:
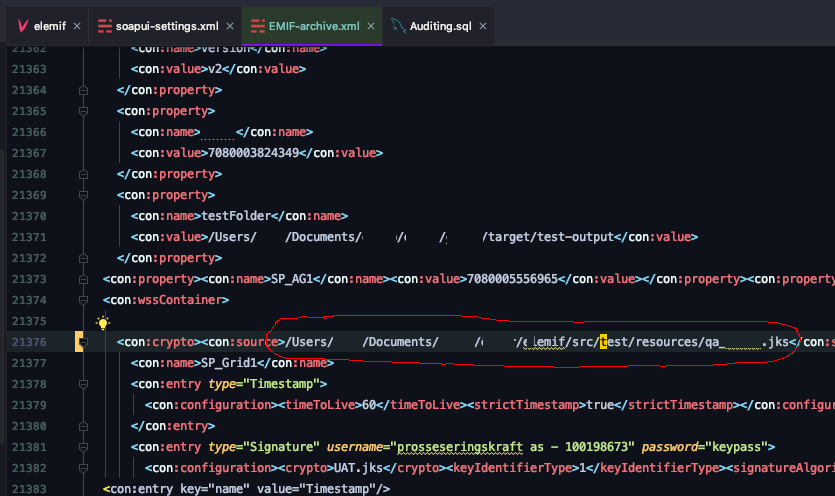
Fig. 4. Absolute Java Keystore path in a project file
When we then open our project in SoapUI, and we open Project->Show Project View menu, we can verify that SoapUI can recognize and verify our Keystore
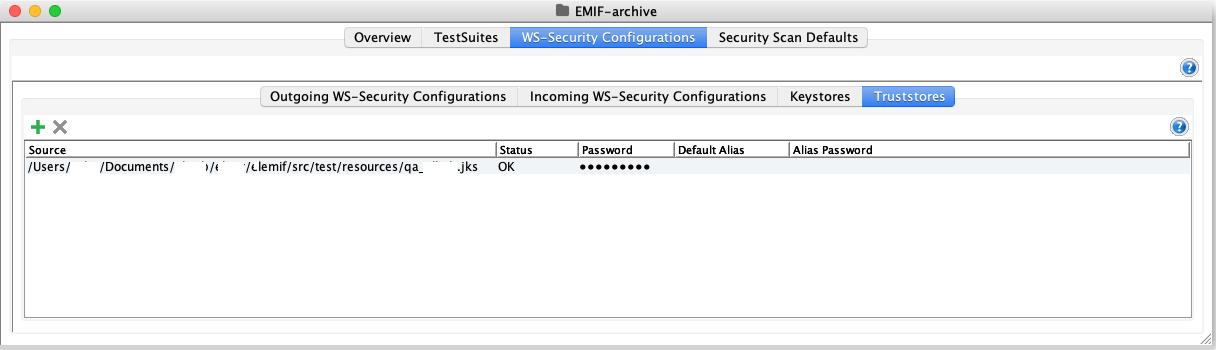 Fig. 5. Absolute Java Keystore in Show Project View dialog
However, to run the same project on Jenkins server, we have to supply relative paths. Thus we have to modify the project file to use the relative path:
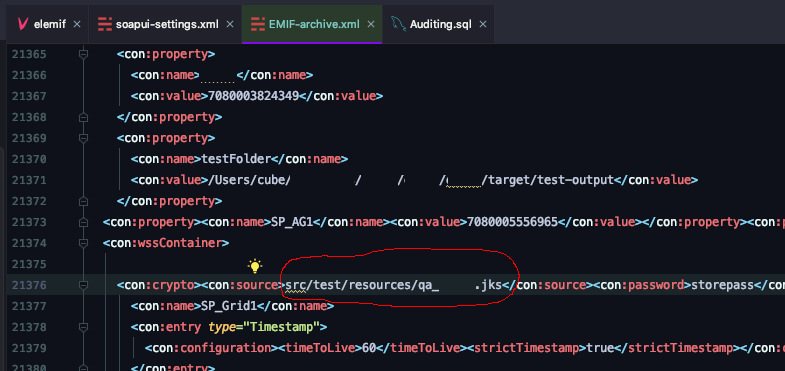
Fig. 6. Relative Java Keystore path in project file
When we than open the same project in SoapUI we can see that SoapUI is not able to recognise location of Java Keystore and thus not able to use it:
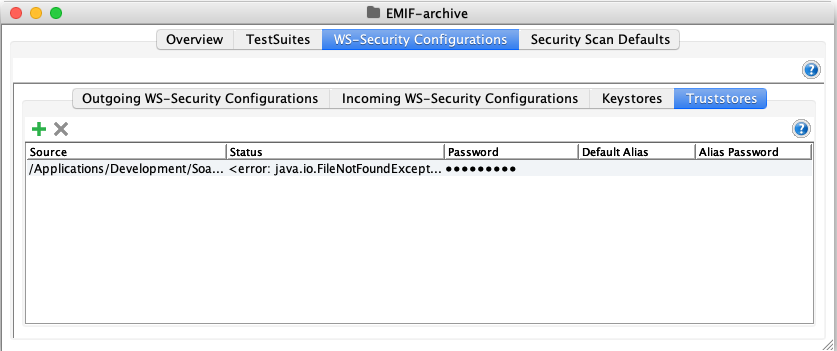
Fig. 7. Relative Java Keystore in Show Project View dialog
The same principle has to be applied to all other files. Unfortunately, SoapUI is not capable of working with relative paths, so in order to test our test cases in SoapUI we have to use absolute paths but to run it on the Jenkins server, we have to use relative paths.
3. Prepare the Maven build
SoapUI Maven artifacts are not stored on the Maven Central repository. Thus, we have to add an additional repository location for the Maven settings file, which is located in the users' home folder (usually: $HOME/.m2/settings.xml), assuming that we have downloaded and installed Maven support previously (Installation instructions can be found here).
In this case, the easiest way to modify settings.xml the file is by adding additional <profile> XML element under the <profiles> section and then reference it in <activeProfiles> section, as in this code excerpt from settings.xml:
After we have enabled additional repository locations for SoapUI specific artefacts, we are able to specify content of pom.xml which is a Maven build file and is located at the root of our IDE project location. Content of a pom.xml file can look something like this:
The Maven plugin responsible for executing the build process is: soapui-maven-plugin and this plugin allows for one or more <execution> blocks inside <executions> element. Each <execution> block is responsible for running one SoapUI project. Which project file to run, which test suite to run, or even specific test case to run is defined with: <projectFile>, <testSuite> and <testCase> elements.
Now we can test our build and execute all tests from the command line by executing the following maven command:
If everything is successful, Maven will execute all tests specified in pom.xml file, print results on the console, and store them in text files in target/surefire-reports folder
4. Enable versioning
To have full Continuous Integration (CI) cycle, we have to initialize our IDE project folder as a version controlled folder. The GIT version control system is implemented with the commands:
Then we have to create a repository on the version control server that will contain our project. For GitHub, it is done by clicking on the “New” button under Repositories section. After we have given the name to the repository, we can upload our project to the version control server. For GitHub:
each time we have modified our projects, and we would like to push changes to Jenkins
5. Running tests on Jenkins
Prepare Jenkins file
We want to use new Jenkins pipeline build facilities that treat the build process as a code. Therefore we have to create a Jenkins file that contains build instructions in a declarative form or in the form of Groovy code. Our Jenkins file looks like this:
It essentially says that we do not allow parallel builds. We use Maven to build and the build will start whenever we post changes to the source version control server and then on a daily schedule. It also says that the test outputs are going to be available in the target/surefire-reports/ folder on the server.
Prepare Jenkins server
After we have prepared the Jenkins file we have to create a new Jenkins project by clicking on the New Item button in Jenkins classic user interface web console:
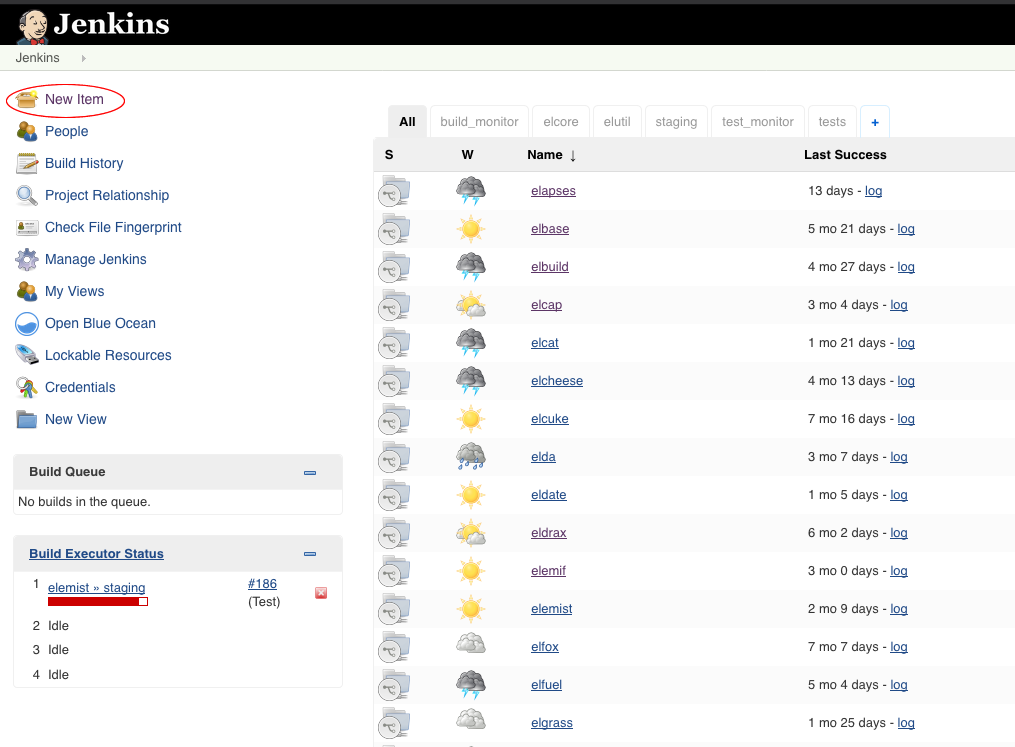 Fig. 8. Jenkins classic user interface web console
From the new page that opens, we can choose to create “Pipeline” project or “Multibranch pipeline” if we plan to have multiple branches in our version control system (e.g. “master”, “stage”) that we build separately with different options:
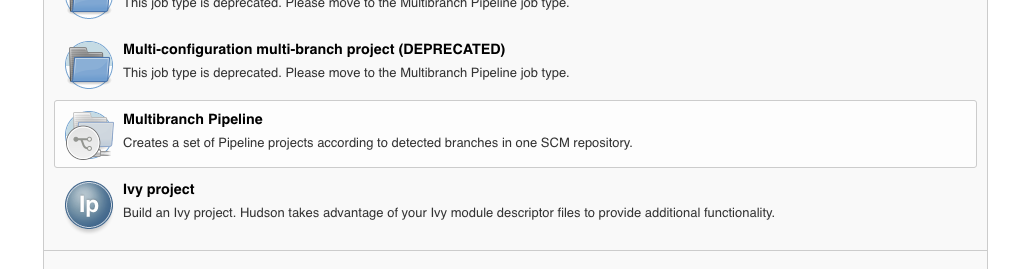 Fig. 9. Multibranch Pipeline creation option
When we have chosen the appropriate option, we have to configure the project. First, we establish a connection with the version control system:
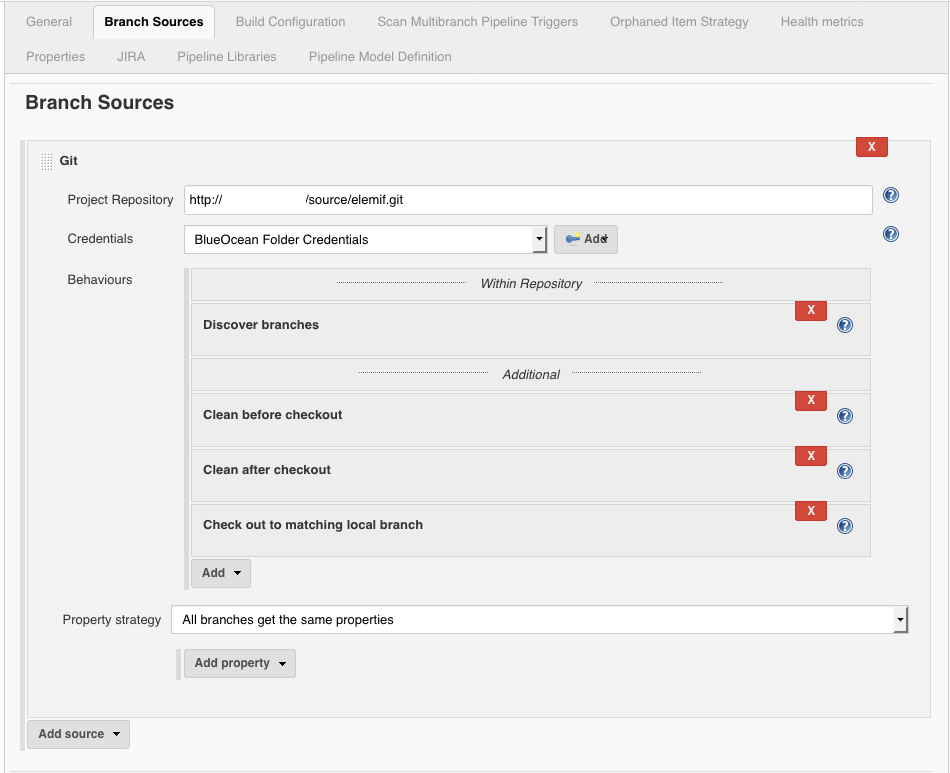 Fig. 10. Connection to version control system
Finally, we define how our build process is going to be executed. As we have opted to use the Jenkins file to define our build process, we are going to specify that option in the “Build Configuration” tab:
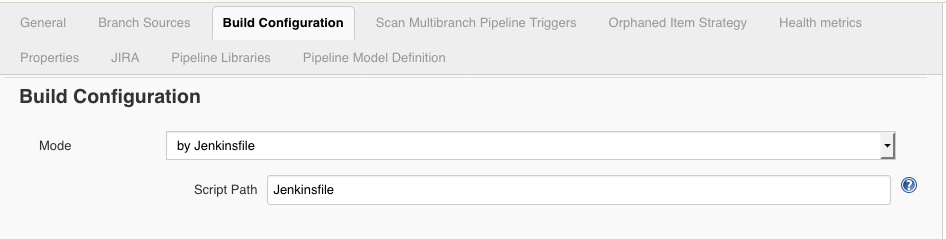 Fig. 11. Build configuration tab
Checking test executions on Jenkins
After we have saved the project, we are ready to run our first test build. Build can be run automatically by pushing changes to the version control server, waiting on a schedule, or running it manually. To run it manually, we have to go to the Jenkins web console and then click the project name we gave to the Jenkins project in the previous step. Then we can choose the version control branch we want to execute:
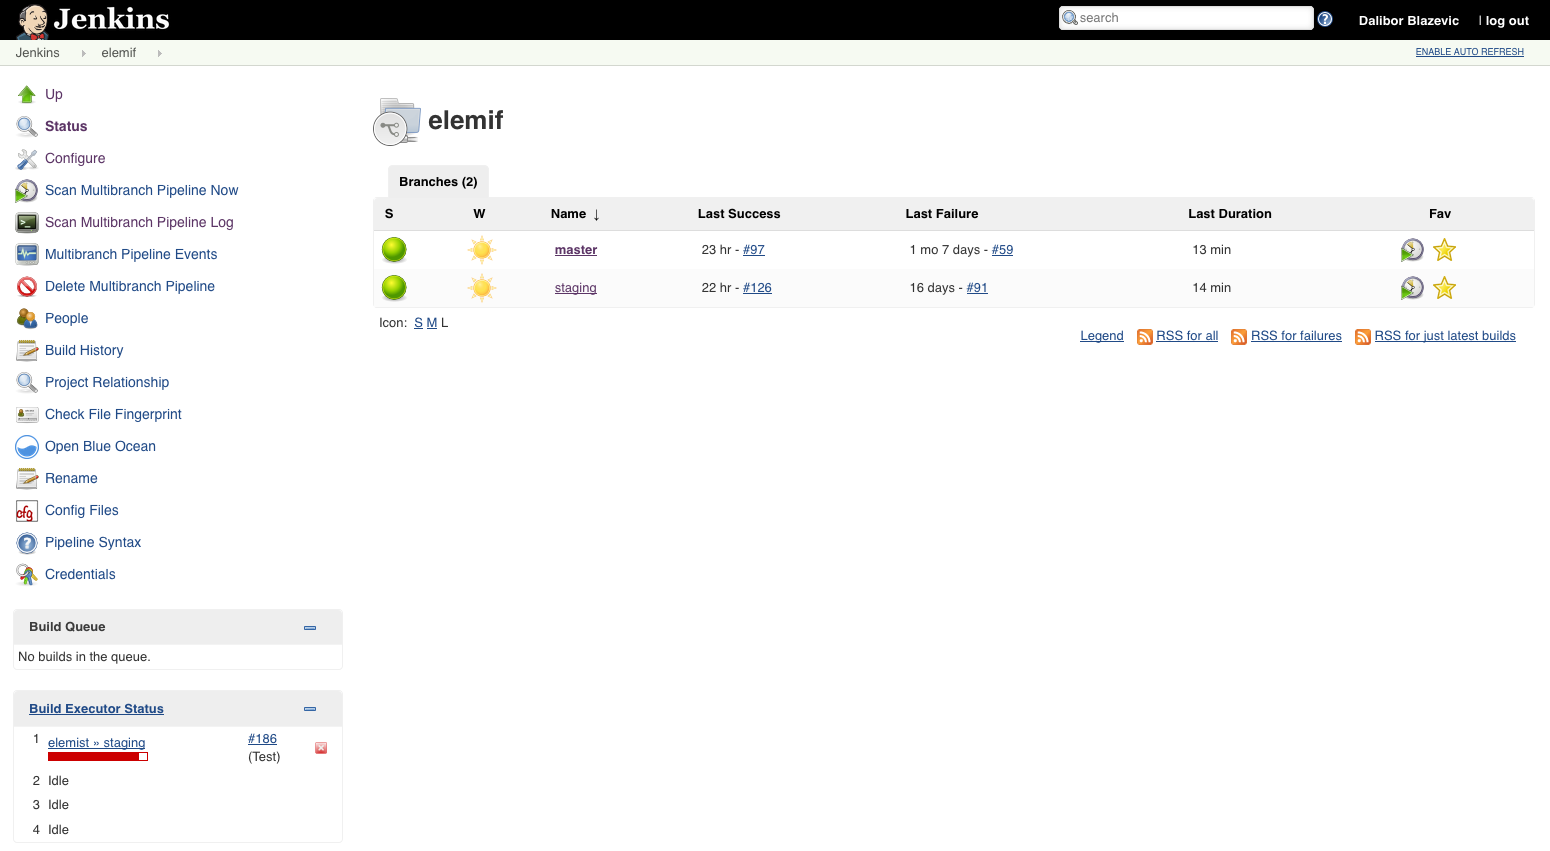 Fig. 12. Jenkins project page
By clicking on a branch name, the page that contains executions statuses and links to reports are opened. We can then click on the “Build Now” button to start our build manually. To check build results, we click on build execution number:
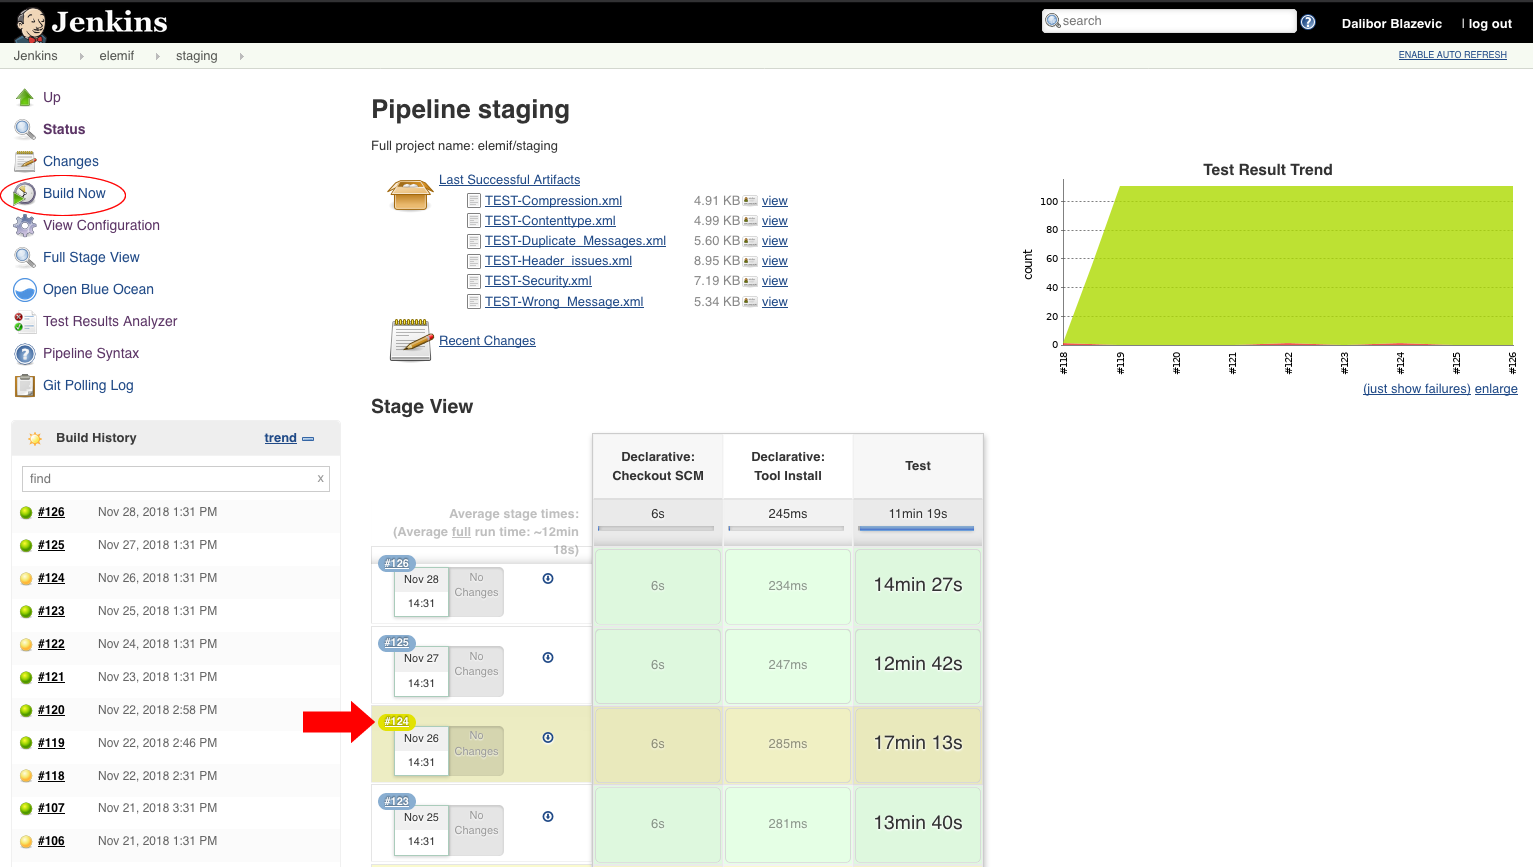 Fig. 13. Branch execution status page
Clicking on the build execution number opens the page, giving us access to various execution status information. Like, access to text console output, pipeline steps, etc., and most important, test results:
 Fig. 14. Execution status information
The test result page displays all successfully executed tests and all failed tests:
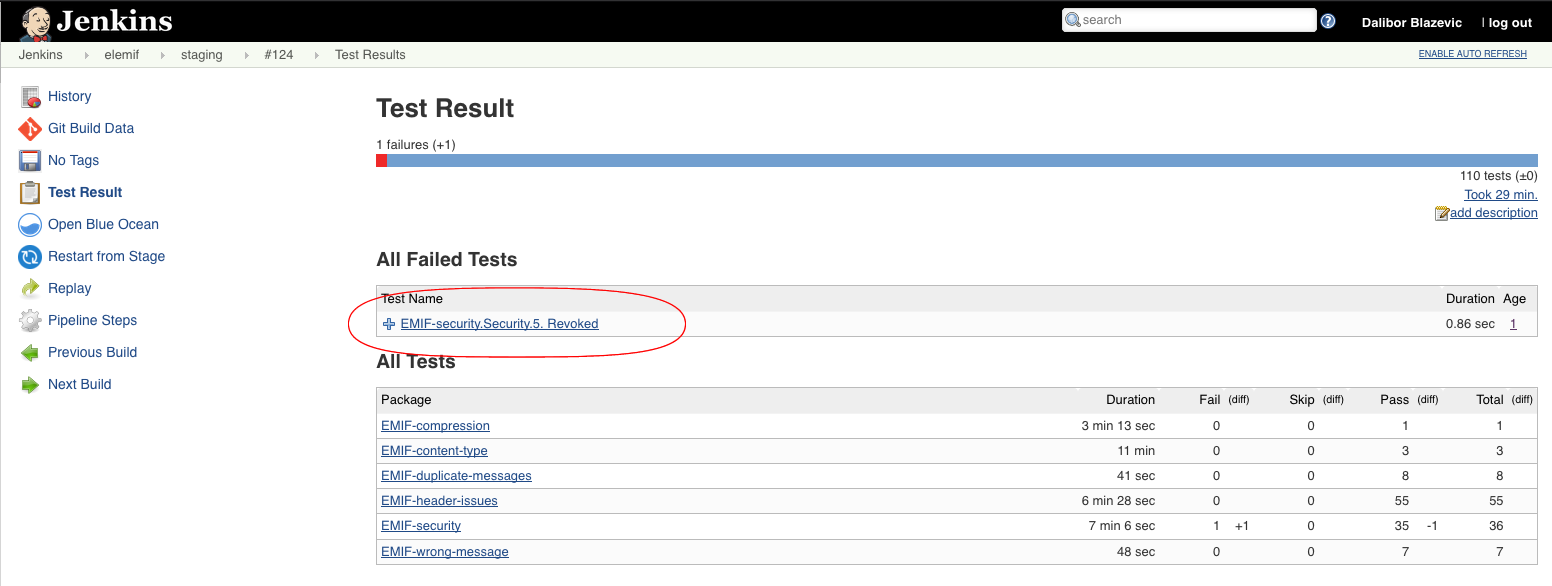 Fig. 15. Test results page
By clicking on the failed test name link, we can see a detailed explanation of why the tests failed that allows for easier investigation and fix:
 Fig. 16. Failure details page
Conclusion
Setting up and running SoapUI tests on Jenkins is not a trivial process but is worth the time and effort invested because this allows us to run fully automated regression tests and automatic system checking regularly. This process also generates reports for every failure discovered in the process, allowing us to apply fixes and patches immediately or roll back our deployments.